This post may include affiliate links.
If you make a purchase, I'll earn a small fee at no extra cost to you.

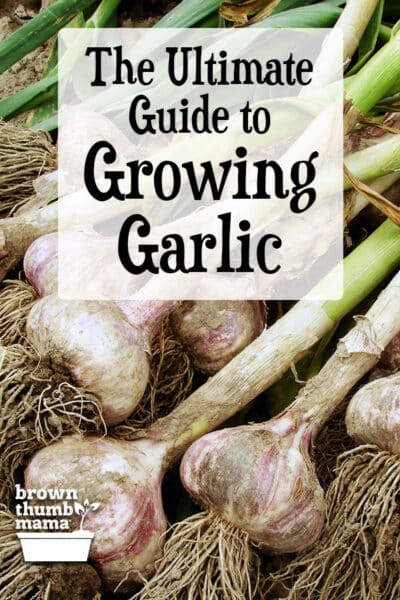
It’s easy to grow garlic! You can plant garlic in containers or in the garden and get a huge harvest. Learn the types of garlic, when to plant garlic, the best fertilizers to use, and how to harvest and cure garlic.
Garlic is amazingly easy to grow, and is one of the few crops that never fails me. I’ve grown it for several years in our backyard garden and always end up with a great harvest.
If you have a little patch of sun in your yard, you absolutely need to grow your own garlic. It does great in containers, raised beds, or directly in the soil. Let’s cover some garlic basics before we head out into the garden.
Types of Garlic
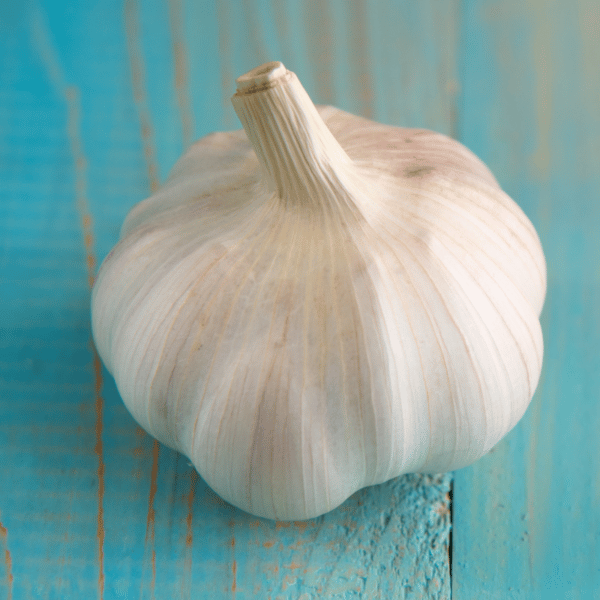
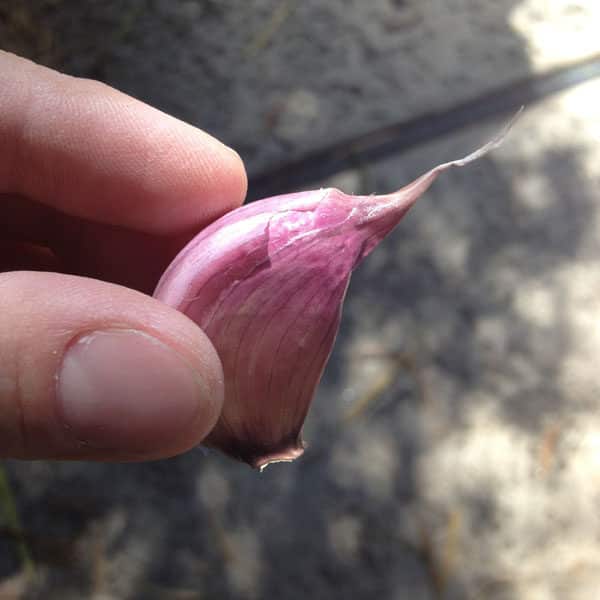
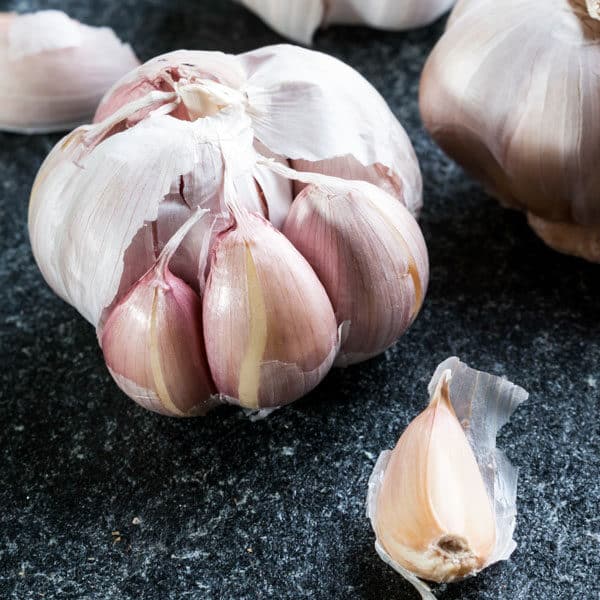
First we need to talk about garlic anatomy. The terms “garlic bulb” and “garlic clove” are two different things, and they aren’t interchangeable! A garlic bulb, or head of garlic, means this entire thing.
Garlic cloves are the individual pieces inside the bulb. Each garlic clove that you plant will grow into an entire head of garlic.
Garlic’s species name is Allium sativum. If you studied Latin in high school, you’ll recognize that the allium name means that garlic is related to onions, shallots, leeks, and chives. There are two major varieties, hardneck garlic (ophioscorodon) and softneck garlic (sativum).
By the way: elephant garlic (Allium ampeloprasum) is not a true garlic. It’s a type of leek that provides very mild garlic flavor. It’s impressive in size but not in flavor.
There are many different types of garlic, with different tastes, hardiness, and storage life. It’s important to know which kind is best for your garden before you start planting. When choosing which type to plant, consider its country of origin and your climate. If you’re in Florida, for example, a garlic variety that originated in Russia probably won’t grow well.
Hardneck Garlic
Hardneck garlic is best for growing in for cold climates. But what does “hardneck” mean? This refers to the thick stem or flower stalk that grows up in the middle of the bulb.
This thick stem is called a scape, and it usually grows into a squiggle at the top of its stalk. Scapes can be harvested while tender and green, for use in scrambled eggs or stir fry. They give a mild garlic flavor, equvalent to that of a green onion.
If you leave the scapes to grow, they will become woody (i.e., not good eats) and eventually flower. I harvest the scapes so that all of the plant’s energy is going toward growing a larger bulb.
Hardneck garlic typically has a single layer of large cloves, and the paper “skin” that encloses each clove is easy to remove.
Sounds like a dream, right? Bigger cloves, easy to use…the only drawback with hardneck garlic is that it’s not good for long-term storage. It starts to sprout and grow within 2-3 months of harvest.
If you harvest more garlic than you can eat, it’s easy to freeze extra garlic with these tips.
Popular hardneck varieties include Chesnok Red, Music (or Musik), and Spanish Roja.
Softneck Garlic
Softneck garlic grows best in mild climates, and it doesn’t have a stem, or scape. Because the plant isn’t expending energy growing this stem, softneck garlic heads usually have more cloves than hardneck garlic.
The inner cloves are smaller, and there can be anywhere from 4-8 larger, outer cloves. This can be helpful for chefs who want the option to choose larger or smaller cloves in a recipe. You can also save the very largest cloves from your harvest to plant next year.
If you like to braid and hang garlic in your kitchen, you’ll want to use softneck garlic. You can easily braid the leaves, since there is no woody stem. Softneck garlic keeps up to 9 months.
Popular softneck varieties are Inchelium Red, California Early, and Nootka Rose.
Planting & Spacing
Here in Zone 9, we plant garlic between September and October (the earlier, the better). Garlic has a 9-10 month growing season, so choose a part of your garden that won’t be needed until late summer.
You can plant garlic directly in the garden, in raised beds, or in containers. Use quality soil and add lots of well-rotted manure and homemade compost to make sure it gets the nutrients it needs.
Garlic needs to be spaced properly so it has room to grow. Each clove should be planted 4-6″ apart and 3″ deep, in full sun.
Because I plant so much garlic, Hubby made me this plantermajigger from a piece of scrap wood and some dowels. He attached a couple of old drawer handles on the top so I can easily press it into the soil and lift it out.
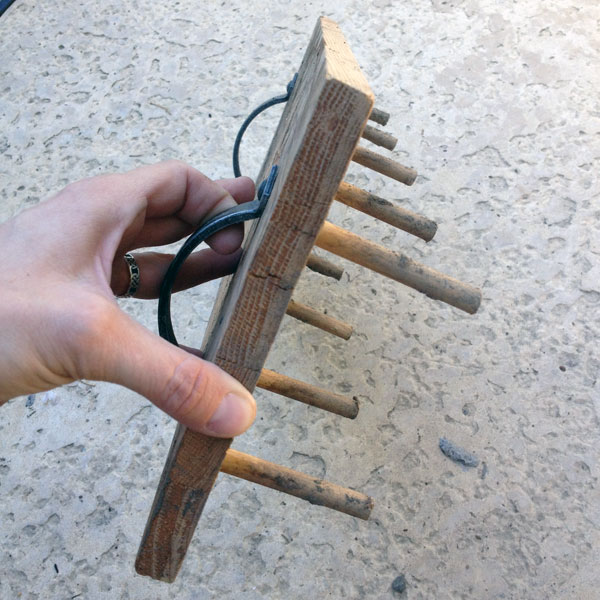
If you don’t have a plantermajigger, no worries. Just poke holes in the soil with a pencil or stick.
Prepare for Planting
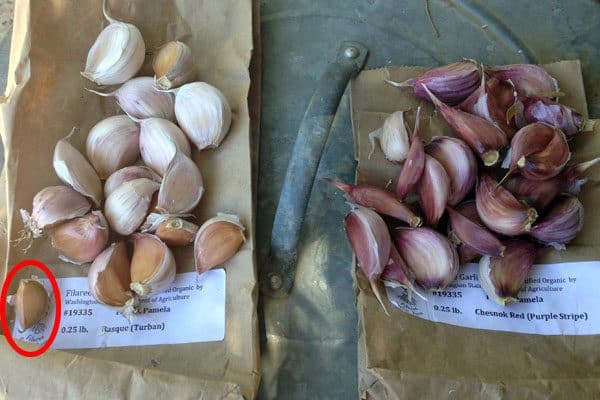
Now it’s time to prepare your seed garlic. I like the different varieties from Renee’s Garden and Botanical Interests, but you can use organic garlic from the farmers’ market too. Don’t use the kind at the grocery store, because it’s usually sprayed with chemicals and stuff that keeps it from sprouting.
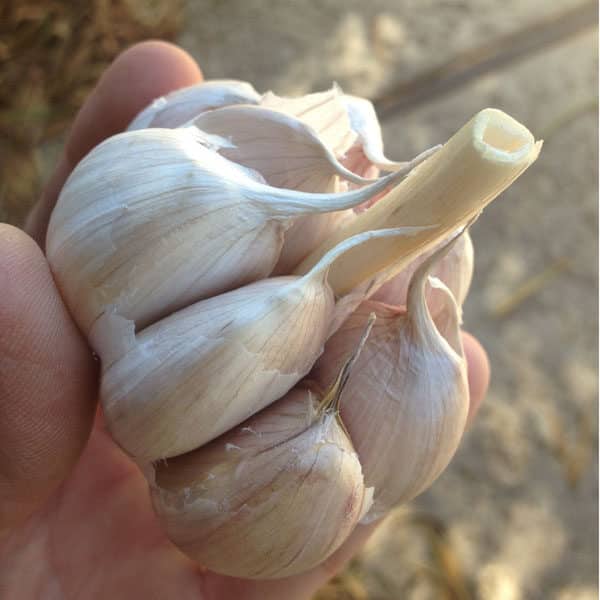
First, take off the outside “paper” so you can see the individual cloves.
Then pop the cloves off the base and get ready to plant. Note: don’t plant the tiniest cloves, like the one in the lower left corner. Tiny cloves make tiny crops! Save those for cooking.
You’ll push one clove into each of the little holes you made. Be sure you’re planting them right side up, with the pointy part up and the root-attachment down.
After you’ve put one clove in each hole, spread some soil over and pat it down gently. Then water the area with diluted kelp fertilizer to start ’em off right.
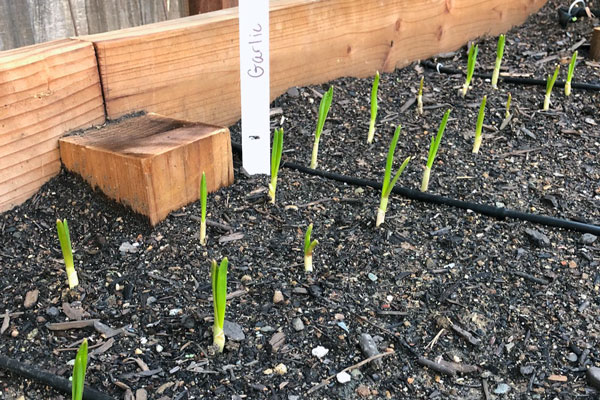
After a week or so, you’ll see the green shoots sprouting through. Now it’s time to do something that seems counterintuitive–it’s time to mulch the entire area with a few inches of straw.
Why on earth would we do that? If you’ve ever had garlic sprout on your counter, you know it will grow under the toughest conditions. The straw mulch insulates the ground, keeps the soil moist, and prevents the weeds from growing. The garlic will grow right through the straw, and the weeds won’t.
Watering & Fertilizing
Even though your garlic plants are mulched with straw, they still need to be watered and fertilized throughout the growing season.
Before watering, move a bit of straw aside to see if the soil is moist. If it is, you don’t need to water yet. Come back and check again in 2-3 days. If the soil is dry, water until the ground is saturated. Check the soil each time you water, to prevent downy mildew or bulb rot due to overwatering.
Garlic needs monthly applications of fertilizer to thrive. I like to use diluted kelp fertilizer or side-dress the plants with bone meal to give them maximum nutrients.
Pests, Diseases, Companion Plants
Great news! Most garden pests will leave your garlic alone. There is a small chance you could see damage from onion thrips or onion maggots, but I’ve grown garlic for 20+ years and have never seen insect damage.
It’s more likely that you’ll see downy mildew or bulb rot from overwatering, so always check the soil before watering.
Garlic is a wonderful companion plant! Companion plants are plants that help other plants grow better, or keep pests away. Garlic is a great companion plant for fruit trees and roses. You don’t want to plant garlic near peas or beans, since the garlic will inhibit their growth.
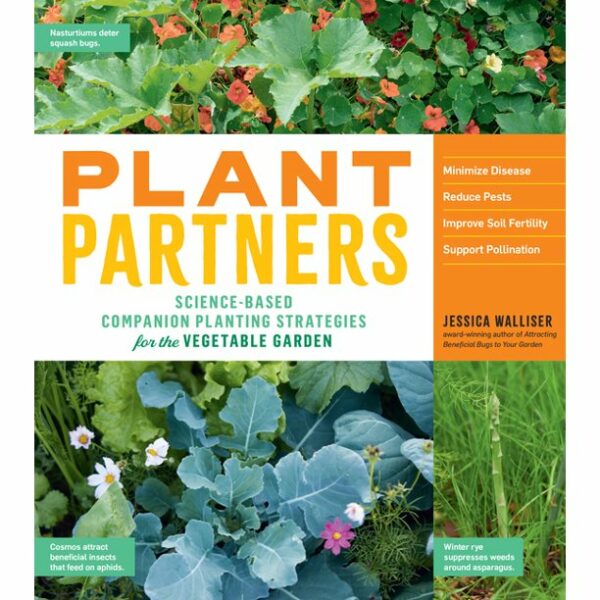
Learn lots more about companion planting with the great book, Plant Partners: Science-Based Companion Planting Strategies for the Vegetable Garden.
Harvesting & Storing Garlic
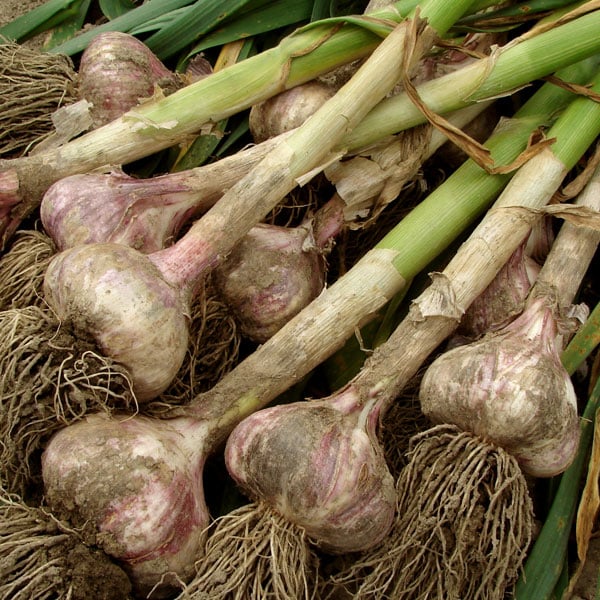
Your garlic will grow throughout the winter and spring and will be ready to harvest in late summer.
When the bottom leaves start to turn brown, stop watering the garlic patch. Your garlic will be ready to harvest about a week after that last watering. Here in Zone 9, my garlic is usually ready to harvest in early July.
You might be tempted to harvest your garlic by pulling the leaves, like you do with carrots. However, I’ve found that this will just break the stems off and leave the bulbs underground. (FAIL)
As you can see, garlic roots are deep and strong. They’ll hang on to the soil and the leaves will give way first, you can guarantee it.
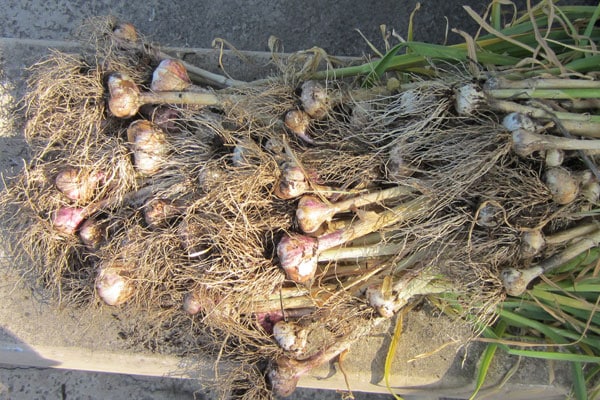
I’ve had the best success with using a shovel or fork and digging down between the rows to lift the bulbs out gently.
Shake off the large clumps of dirt but don’t disturb the outer wrappers or wash the garlic. I leave them outside in the shade for one day (if it’s under 90F outside) and then bring them in to complete the curing.
Curing the garlic helps concentrate the flavors, and allows the garlic to keep longer without sprouting.
I used to bundle the garlic and hang it in the garage to cure. However, because the temperatures aren’t stable out there, it proved to be a bad idea.
Now I use a homemade drying rack (that looks suspiciously like a baby gate) and it works perfectly.
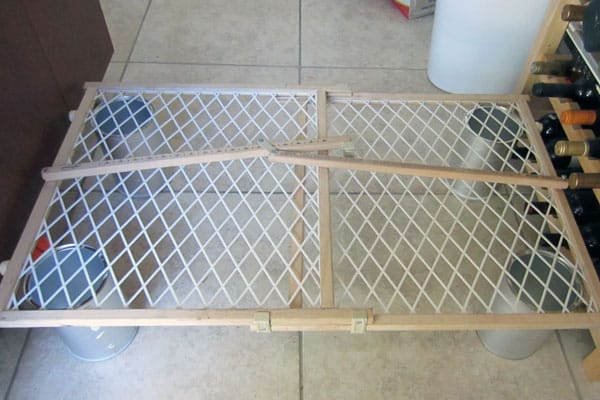
It’s sitting a few inches off the ground so it has good air circulation, and is inside the house and out of the sun.
Before setting the garlic out to cure, dust off any chunks of dirt. Leave the roots and paper intact, and cut off the stems about halfway up.
Lay out the garlic in a single layer on the drying rack. It’s OK if the bulbs touch each other, but try not to pile them on top of each other.
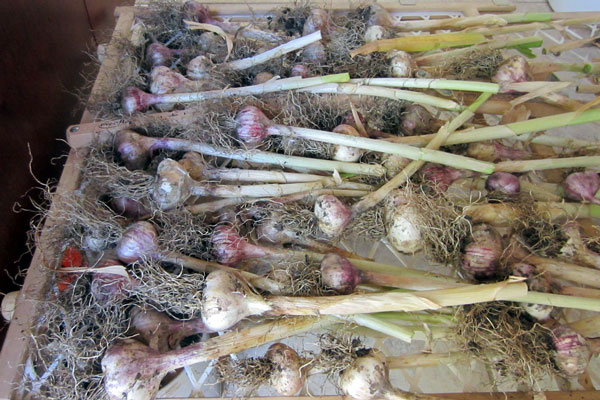
Let the garlic sit on the drying rack, out of the sun, for about 2 weeks. (Your kitchen will smell amazing during this time.)
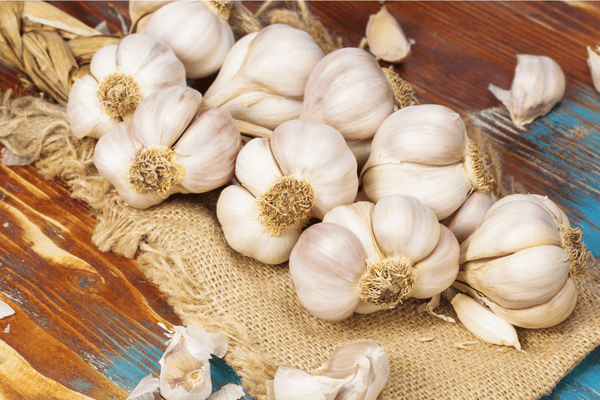
After the garlic has cured, trim the roots off and cut the stems down to storage length. Don’t trim them with scissors! Use clean pruners (these are my absolute favorites) so you don’t introduce any contaminants into your crop.
Reserve several of the largest cloves to plant next year.
Your garlic will keep at room temperature for several months. You can even braid it and display it in your kitchen. How cool is that?!?
Recipes
There are lots of delicious ways to use your homegrown garlic! Here are some of my favorites:
If you still have garlic left over after all that cooking, it’s easy to freeze it for future use. Learn how easy it is to freeze garlic!