This is a fantastic, easy way to make soap without using lye–and it’s safe to do with kids around. Customize your homemade soap with any scents or colors you like!
Did you know that your skin is the largest organ of your body? Makes sense when you think about it. That’s why it’s so important for me to stay away from chemical cleaners, and choose my personal care products wisely.
I’ve read quite a bit about making my own soap. There’s hot-process, cold-process, crockpot soap…lots of different techniques and recipes.
The simplest recipes contain only a few ingredients and are all natural (like the soaps from my friends at Chagrin Valley Soap & Salve). Unfortunately, lye is one of those ingredients–and because it is so caustic, I don’t want to use it or even have it around with kids in the house.
Am I being overly paranoid? Probably. But if I don’t have any lye in the house, there won’t be any spills, nobody will get chemical burns…you get the picture. I’ll sleep better at night.
The secret to making soap without lye is called melt-and-pour soapmaking. With this technique, the lye work is already done and all that’s left is the fun part–crafting your own unique varieties of soap!
Ingredients
Soap base. Soap base is your raw material, and it comes in a block. There are all different kinds–some contain olive oil, some use goats’ milk, some contain aloe vera. Here are my reviews of the top six soap bases and what types of skin they are best for.
A heatproof bowl (I used a large Pyrex measuring cup) for melting the soap base.
A silicone mold or a loaf pan lined with parchment paper. There are a zillion different silicone molds out there. I used a simple mold designed for baking, but the detail on this honeycomb soap mold set is amazing.
If you want colorful soap, there are a variety of natural additives you can use to add color. Here are my recommendations for the best natural soap colorants.
Herbs and/or essential oils, which will give your soap different qualities and fragrances. Here are some combinations I like:
- Ground cinnamon and wild orange essential oil
- Oatmeal (powdered in blender) and honey
- Ground rosemary and lavender essential oil
- Peppermint essential oil and rosemary essential oil
Instructions
Measure out one pound of soap base. (Yep, that’s my postal scale. Why buy a cooking scale when you already have something that will do the job just fine?!?)
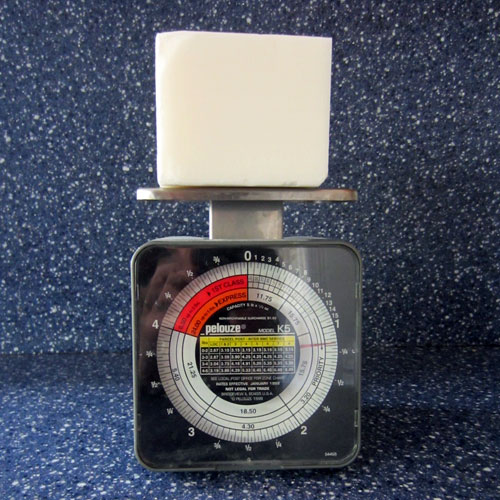
Chop the soap base into large pieces. Put it in your Pyrex and melt it in the microwave or in a double boiler over low heat.
Once melted, add your colorant, herbs or oils (about 30 drops essential oil and 1/2 teaspoon herbs per pound of soap base).
Mix thoroughly and pour into your mold. There may be some small bubbles or drips on the top, but that’s OK.
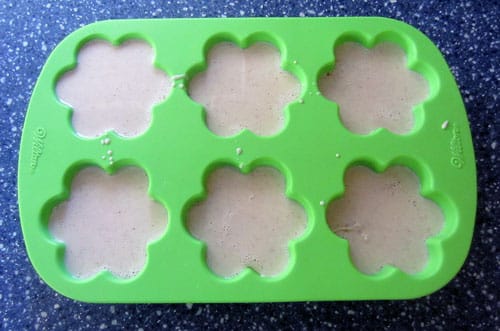
Allow to cool for several hours before unmolding. The silicone pan makes it easy, and the bars are already formed. If you’re using a loaf pan with parchment, you can cut the soap into bars with a sharp knife.
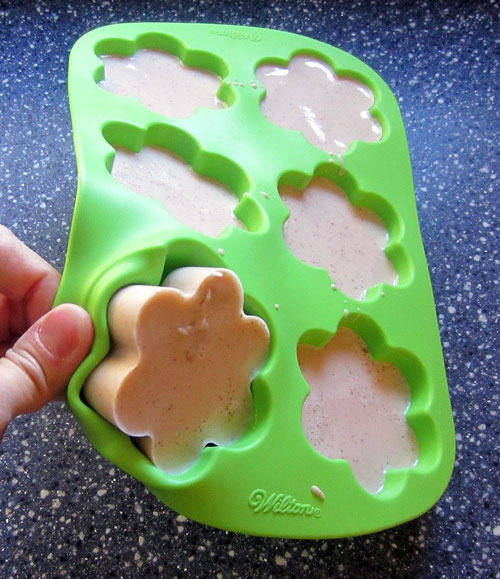
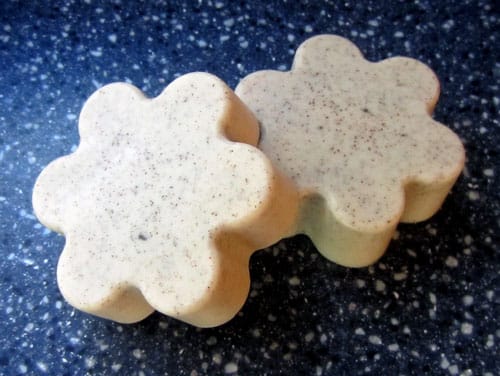
Your soap is ready to use now. It will last longer if you let it cure in a cool, dry place with plenty of air. I cure mine on a shelf in the linen closet, and it smells great when I open the door.
Are you ready to take the next step in soapmaking?
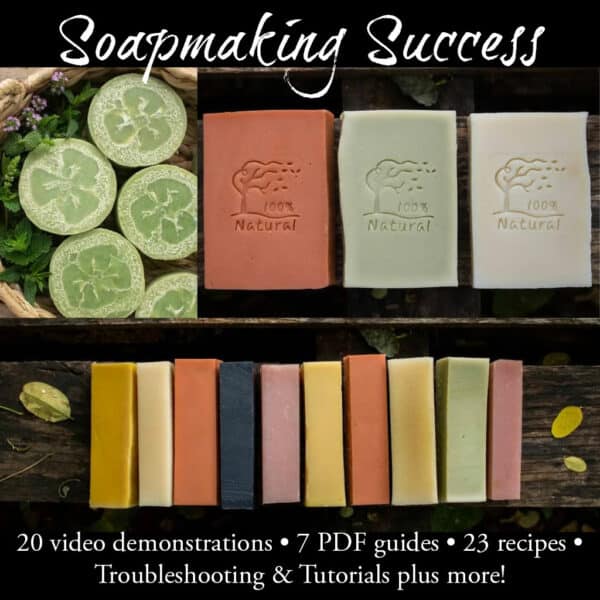
I highly recommend the Soapmaking Success Course by The Nerdy Farm Wife. It contains everything you need to know about making your own natural soaps with ingredients you trust.
There are lots of videos, calculators, recipes, and step-by-step instructions. You’ll love it! Click the photo to learn more.
If you’d rather just buy outstanding natural soaps, visit my friends at Chagrin Valley Soap & Salve. This link will save you $15 off your first order!


Hi Pam. Is lye still one of the basic ingredients in a soap base, even if you don’t actually use it to make the final product? I was thinking I could avoid lye altogether.
Oops. I just read Kari’s comment from January, about the lye cooking out, and not ending up in the finished product. My bad.
First, lye cooks out of the soap. It is not a residual ingredient in finished soap. The soap is safe to use after the soap has gone through the saponification process. Yrs, you can use melt and pour glycerin soap. It’s easy. It’s fun with kids, but it is not actually soap. It lacks lather and is just not as good as hot or cold processed soaps. Renrmber…they are perfectly safe!
“No true soap is made without lye”, there is actually a pre-made soap mixture where the lye reaction has already occurred, allowing you to melt and pour it into molds without handling lye directly.
Key points about soap and lye:
• Essential for soap making: Lye is a necessary component for creating soap.
• Melt and pour soap: If you want to make soap without directly handling lye, use a pre-made “melt and pour” soap base, which already contains the saponified soap mixture.
• No lye in the final product: Although lye is used in the soap-making process, the final soap product does not contain any residual lye if the reaction is properly done.
You cannot make soap without lye. The soap base you use was made with lye. Sodium Hydroxide. It has to have that or a similar ingredient in order to cause the chemical reaction which turns the fats/oils into soap. You may want to clarify, because your title is very misleading.
Thank you for your kind advice
Loves and Hugs
Wonderful, keep going
Such things must never have lye
Can you tell me what you use instead?
How many of the small soap bars does 1 lb of soap base make?
I also used the melt & pour soaps. I use them not only for bath soap but for shampoo soaps as well. I just adjust the oils and other ingredients for the shampoo bars. I’m not afraid to use the lye, I’m just too lazy to do it..hahahaha.
After reading your message. I was very curious of how to make soap without using lye? Soap base is made with lye. I’m a professional soap maker and I also have a business selling soaps & products. I make my own MP and yes I use lye to make it. I make MP, CP, HP and HT. This was miss leading I formation, a beauty bar is made without lye. Instead of lye, it’s replaced with steric acid and E-wax and other great ingredients. I’m not trying to give you a hard time, just this is miss leading.
Maybe used making soap without handling danger of lye. I would love to see what you have for beauty bars. Their one of my favorites ❤️
Are you saying that if you use soap base you don’t need lye because it’s already in it, therefore she is misleading?
I was interested in how homemade soap could be made without lye as an ingredient, and without harmful ingredients. I see that you promote using greener products. However, your link to the soap base takes me to a shea butter on Amazon with propylene glycol as the second ingredient and it is a known carcinogen??
Hello I have to beg to differ about the soap base if you read the of the block giess what it does have lye or Noah for those who don’t know. I am a soap maker and that was one of the main reason why I strayed away from it. Yes it’s very intimidating for many but those soap bases you don’t get much out of them and if you sell like I do you really not getting your money’s worth first of all. My soaps when broken down only has one chemical in it and it is needed to bake it hard. I became a chemist on making soap. My teacher once told me if you can’t pernounce it, it’s a chemical. I even went as far as to asking the FDA and the told me the same thing I learned on my own. I make body washes, body butters and scrubs and my customers love them and they even said the same thing to me. They love my stuff because when I say it’s all natural it is. Thank you though.
Hey, I found your soap technique interesting and easy to create but I don’t have idea about how to check the skin type.
I will never understand why people say it is a “no lye” soap. Melt and pour bases have lye, it is just incorporated for you. you will not have suds without lye.
She says without using lye. And she also states that the melt and pour has the lye already added for you. This is just so YOU don’t have to deal with the chemical process.
This is extremely misleading.. the soap base didn’t mysteriously appear out of thin air. Its made with lye. All soap is. It is by definition how soap is made. No lye, no soap.
It’s not as scary as you think lol
I recommend trying it just wear gloves and pour lye in the water not water in lye outside! I have used the melt and pour it’s not the same!
Hi Pam, Thank you very much for your post. Interesting read and very informative! Just a suggestion, ignore the haters and before you take the criticism note who its coming from. Most people lack common sense 😉 Your title is 100% correct and helped me understand soap making better.
– Body Cream Manufacturer
You sure lack common sense as well. No lye, no suds. Common sense.
This is not making soap. This is melting a soap base and remoulding it. Don’t mislead people. And all those ‘chemicals’? A whole lot of them are contained in the soap bases that are meltable.
Can you mix bases? Like could I use half goat milk base with the aloe base?
Yes you can. Just understand even the bases have lye or you would not have suds. How ever, by the time you get the base, the lye has subsided in order for you to use it without problems.
Amazing how rude some of these comments are. If you are all soap experts then why are you reading this post. It appears you already know everything. I did what Pam recommended and it worked fine for me. If you can’t leave positive comments then don’t leave any at all. This poor woman is just trying to help people.
People would not be rude if she was not lieing. ALL soap has lye or you would not have suds. Do your own research and find out before you comment.
I see your repeated comment of no lye no suds, but the Bend Soap company produces soap without it, and it suds up just fine. It is the only soap I purchase now. Their unscented goat milk soap has this on their label for ingredients: Fresh Goat’s Milk, Saponified Coconut Oil, Olive Oil, and Red Palm Oil.
Hi Lisa,
Sorry to interfere but no matter how rude Adrienne is, she is right and you are falling into the trap like most people here …. In your case the unscented goat milk soap that you love so much does contain lye too, it is hidden in the name ” Saponified Coconut oil” … in order to ‘Saponify” the coconut oil they mix it with Sodium Hydroxide which is lye, the myth of soap with no lye is a lie ! 😀
Julie,
Thank you for your comment. I’ve been interested in learning to make soap, but didn’t want to mess with lye.
I believe she did mention earlier in her article, that soap base already contains lye, so it’s already done for you. Anyway I’m going to try it this way, since the base is already done.
As for the rude comments, you are totally correct.
I agree. Can’t say something noce, don’t say something at all. Courtesy goes a long way and frankly those who think it’s good to insult folks need to go look at themselves before calling out others.
Hi Pam . I love nice soap but as it’s quite expensive am trying to make my own. I have made some using a bought base, but it doesn’t foam very well. We are in a hard water area, but commercially bought soap works better than my home made. Is there anything I can add to the base to make it froth more ? Thanks, Bridget
Thanks for sharing this, Pam! I just used some lemon oil and a little rosemary and it turned out awesome. I was a little nervous because I had a carpet cleaner out recently to freshen up my home (don’t worry, he only used natural solutions) and I was nervous that the soap might be overpowering with the other scents I had going on. I’m pleased to say that it did not! Your recipe created a perfect soap that’s not overpowering but still smells soooo good. Thanks again.
Thank you for this post. I’ve been making soap with a premise base for nearly 20 years, and whatever you all wanna call it, my customers and I have been getting clean. Maybe it’s something better than soap. Even if there is a minuscule amount of lye in the base, it’s not a detrimental amount of it, like in store bought soap. Making soap with soap base is the safest way to go, especially for problem skin.
I’m not being smart but how do you think melt and pour is made?
So, you’re not really making soap!
HI, I myself have gotten into making homemade soap. The first time I used only a soap based, and I added oils, then transferred the soap into the mold. But when they dried, it was more oily than soapy and lathering. Was I supposed to add melted soaps like African black soap to make it soapy? What should I do differently next time?
It’s called melt and pour. There is saponified lye in it. THERE IS NO SOAP WITHOUT LYE.
Thank you Torri. I was about to comment. All soap has lye. Just melt and pour is a base already made. So you basically don’t have to make it from scratch with lye. If you go to links of the melt and pour bases she suggested and read the ingredients, one of them is sodium hydroxide (lye).
All soap bases are made with lye then shipped to stores so people who don’t want to work with lye don’t have to. When lye water is mixed with oils saponification happens. Once water is evaporated soap is made and the soap no longer has lye in it. It’s true science.
Hi, I have featured this informative article in my soap making projects article. Thank you for writing this for us. You can find the post at: https://www.craftionary.net/soap-making-projects/
I just came across this article and it was just what I was looking for. I don’t understand everyone being so hateful saying that you aren’t really making soap. You clearly stated that you used a soap base. Also, where are these people getting their lye? Did they buy it at a store? If they didn’t burn wood to get ash for the lye and save the fat from an animal then they aren’t really “making” traditional soap either, are they?
I dont think people are claiming they are making traditional soap. Yes you buy lye from a store. The issue is she is claiming to make soap without lye and you can’t. All soap has lye.
I think that a lot of you are missing the point. The point is “with kids around”. Lye is inherently dangerous because it is very caustic ( try drinking it, LOL ). Anyway using an already made base and adding your preference of scent, oils or springs of ? is a great way to get kids involved in doing something they will use without exposing them to the dangers!!!! of pure lye. This is a safe way of making a soap with your kids, especially the young ones.
What a great idea! This is something I may be able to do!
First, she knows she is using a premade soap. She doesn’t try to hide it.
Second, lye will give you a bad chemical burn. All the negative commenters know this. With kids around doing a craft project with mom, that is a big NO!
Third, I almost NEVER read comments and these comments are why. I am a 58 year old woman and run from women like the nasty posters here. Life is too short to live your life in such a vile manner. The need to belittle other people in order to make yourself feel important is called misogyny. Have a nice day ladies.
Do your research before you comment next time. You can not have soap with suds without lye. So run baby run.
I felt every word you said. I have been appalled at these comments. They clearly don’t have reading skills, manners, and definitely weren’t taught to walk away if you don’t have anything nice to say. They must be really unhappy to troll pinterest and find fault in others.
You cannot make soap without lye. The saponification process will not happen. The soap base has lye in it. Using a lye calculator will tell you the ratios of fats to lye. I’ve used the soap base before. Not near as wonderful as homemade. I’ve been making soap for years. The soap base is great for ones who do not want to invest in the supplies for truly home made soap.
Exactly! The soap base is made with lye!
Lye is toxic, that’s why people use other things other than lye. There are plenty of companies that do not use lye
Hi Yomari what can be used instead of the lye to harden the soap?
Hi! I saw this on pinterest and was curious to read it, because I was of the understanding that all soap contained lye.
So, you use soap base, which, as you see from other comments, contains lye. Your title is misleading, at the least, or a flat out dangerous lie, at the worst.
Honestly, it makes me not trust you and not want to read anything else by you.
You should change the title, rewrite the whole post, and apologize.
So I guess I don’t understand the concept. You’re making soap, but use a “soap base”. Do you have a recipe for the “soap base” so that I don’t have to buy it?
You should never use ground cinnamon in soap or lotion. You can get actual burns on your skin from the oils in the cinnamon. Also this isn’t making soap. You’re using soap that has already been made with lye and just melting it down and molding it. Melt and Pour isn’t making soap. That’s fine if you want to purchase soap that has already been made but your title is very misleading because you have to have lye in order to actually make soap,
Why you hating. If you want to make soap with kids having the base is much safer. It still contaons lye to make the finished product. Haven’t you ever bought a cake mix are you saying just because you only added egg and oil you didn’t really make a cake?
I get what your saying and makes perfect sense. THESE PEOPLE ARE HATERS AND HAVE CLOSED MINDS..UNBUTTON YOUR SHIRTS OR GET YA PANTIES OUT CV YOUR ASS..I MAKE BOTH SOAPS AND SOAP IS SOAP..AND YOUR DOING Great JOB..I use cinnamon mixed with carrier oils and love it ..
You are representing your brand, and by your post I’d never buy from you. You don’t need to put other people down. This is a great post, and using melt and pour soap bases has a place all of its own, and thanks to this post I’ve just learned about it. Your comment is really bigoted and narrow-minded.
Excellent post and wonderful blog, this sort of interesting posts I really like, keep it up…
Excellent post and wonderful blog, this sort of interesting posts I really like, keep it up…
Thank you for making us read this well written article on how to make soap without lye. I enjoyed reading this article as it provided us lots of information regarding it. I am sure many people will come to read more about it in future.
Hi,
Love your information and I’m so happy I found your website.
I have a question, can you use infused oils in melt and pour soaps?
I currently have a batch of calendula oil and I wanted to use it but there’s not much info on infused oils and soap (melt and pour).
Thank you in advance for taking the time to answer me.
Liz
Liz, unfortunately if you add anything to melt-and-pour soap, it won’t set back up properly.
If you want to make calendula-infused soap, use the recipes in my friend Jan’s book: https://transactions.sendowl.com/stores/4729/179443
That’s not true you can add 1% to 3% of additives to every 1 pound of soap. It’s a soap base which means it already has lye in it. This basically means that with the proper instructions you can add many different things to it.
Unfortunately using infused oils won’t mix well with the melt and pour soap since saponification has already happened. Essential oils can be used but it’s best to use an essential oil calculator to know correct usage rate.
Hi,
Love your information and I’m so happy I found your website.
I have a question, can you use infused oils in melt and pour soaps?
I currently have a batch of calendula oil and I wanted to use it but there’s not much info on infused oils and soap (melt and pour).
Thank you in advance for taking the time to answer me.
Liz
Liz, unfortunately if you add anything to melt-and-pour soap, it won’t set back up properly.
If you want to make calendula-infused soap, use the recipes in my friend Jan’s book: https://transactions.sendowl.com/stores/4729/179443
Excellent post and wonderful blog, this sort of interesting posts I really like, keep it up…
Excellent post and wonderful blog, this sort of interesting posts I really like, keep it up…
Yes you’re being paranoid. If you use a lye calculator (there are several online), then you will know exactly how much lye to use to saponify your oils and there will be no lye left over.
Hi. Can I melt soap base without microwave? And if can, how?
Thanks
Hello!
I quit reading all of the comments because of the negativity they contained so I’m not sure if this was asked. I would appreciate a reply ONLY from the maker of this post. Thank you in advance for the respect.
Can you just melt a mild soap like ivory or dove?
Hi Faith, I’ve heard of people melting Ivory soap and mixing with water to make liquid soap, but I haven’t tried melting it and reforming it. Most commercial soaps have lots of chemicals in them, so they probably won’t melt properly. I have heard that if you microwave Ivory soap, it will puff up like a marshmallow! I wouldn’t recommend it. :o)
I am so sorry for having to agree with the majority of the comments but you are not making soap. And that “soap base” is soap already made so what you are doing is just adding fragrance and color. Last time I checked that part isn’t soap making, not even cutting it into shapes. Next thing you are going to post how to make ice cream by adding chocolate sirup and whipped cream to it. Good luck with your “soap making”.
I’m pretty sure we all get it now – melt and pour is not same as make from scratch! But – for those of us who want to buy a natural (research!) soap base and customize with our own additions and fragrances, this is also ok. You do you. We don’t all have time or desire to make from scratch and I refuse to feel bad about that. If you are careful choosing a base and additions you can have a much healthier product than commercially mass produced bars and for some of us these baby steps are good enough. Remember to be respectful and open minded – we all are just doing our best. Your soap may not be caustic but a lot of you comments are❤️
❤️
Hi! Do you have any recommendations of adding breast milk?
There are no “real results”. All soap has lye. Period.
how long will it take to cure
LOL. NO soap contains lye, but there’s no such thing as MAKING soap without lye.
Please change the title of this article. Melt and pour is great for kids to get started with but is DOES contain lye. Just already processed lye. The title is misleading.
I love your comment! I’m interested In making soap and add some of my juice pulp to it. Would that be a good idea
For those people who are afraid of lye in soap: I once read someone saying: to say you don’t want to use soap because it contains lye, is like saying you don’t want to drink water because it contains hydrogen …
Lye and fat get used up and form a new substance: soap. Basic chemistry.
To those who think home soapers are snobs: commercial soaps contain a lot more then just soap. Apart from the obvious chemical perfumes, hardeners are added, and sodium laurel/laureth sulfate (look up what that does to your skin) to make it foam more. As an added bonus, home made soap contains glycerin that is formed naturally as a byproduct in the saponification, but gets taken out of commercial soaps to be sold separately.
Slightly miss-leading soap bases contain lye not sure why this post is called making soap w/ out lye? It’s simply untrue.
KATHY
I make soap with absolutely no lye and sell it, everyone loves it
How do you make it?
Reading the ingredients just gives me the chills…..antifreeze is the first one!!! Lye when used correctly is not caustic….and personally I would rather work with lye than antifreeze!! And add to that….there is lye in it….you have to have lye to make saponification…..just science.
I have used lye since the very first time I ever made soap. It’s no big deal. It’s not scary or hard.
A quality soap base is so expensive. And how do you really know what’s in it?
I add every single ingredient myself and I love it. I know exactly what’s in it and the cost is much lower.
I’m not a soap-making snob, I just don’t want to say I made something when I’m using someone elses base. It’s the most important part!
And it’s really nothing to handle the lye. Probably a lot safer than driving to the grocery or mowing the lawn.
It’s a creative process sure, but it’s still not soap-making. Just like buying cupcakes or cookies at the store and icing them at home isn’t baking but cupcake and cookie decorating, even though it can be a very creative process. Imagine an article claiming to teach you how to bake a chocolate cake without chocolate, then the instructions are to buy a chocolate cake at the store and put icing on it. And then to see people suggesting that the resulting cake is safer or healthier for people to eat as if it would be less fattening or less likely to set off a chocolate allergy because it “doesn’t have chocolate”. Really pretty ignorant, untrue, and insulting to people who actually took the time to learn how to bake.
I checked out their goat’s milk soap bases and there are 15 ingredients in their “natural” goat milk soap base. They include palm oil (terrible for the environment and human rights), plus a bunch of unnecessary extra stuff. You can make a good goat milk soap at home with 3 ingredients. Lard, sodium hydroxide, and goat milk. It will turn out just as white and luxe as the one in the store, minus all the random additives.
AFAIK there is no safety organization that advises against using lye while pregnant, since the exact same safety procedure is needed whether you are pregnant or not. There are, however, many that warn against exposing pregnant women to various essential oils, which are often used in melt-and-pour soaps.
The lye from my local hardware store is fine. There are lye-based products that have other things in them, but if the ingredients say 100% sodium hydroxide then it’s fine to use. It’s not like the hardware store is intentionally trying to trick anyone with counterfeit lye. (OTOH, don’t use EVOO for your soapmaking since that often IS adulterated with other oils intentionally, and that changes the amount of lye you would have to use to properly saponify everything. Plus it’s expensive; just use low-grade or pomace olive oil if olive oil is what you’re using.)
Besides the lye factor, I have two issues with her directions. 1. She does not state exactly how long to cure the soap. 2. She does not state how long to microwave. Being a first-time soap maker, I over-microwaved and it bubbled all over my microwave. Bummer. Then I read the part about one cannot make soap without lye. Very disappointed in this article. I’ll be looking for another one for my next round of soap.
Well, you’re obviously not a soapmaker. I can spot that premade crap with glance and certainly with a touch. Most commercial bases contain piles of chemicals not present in real handmade cp or hp soap. I can’t even use that premade crap; it dries out my skin so much that it feels like it’s going to split open. Caring about what you put on your skin is NOT SNOBBISH. Make some real soap and then come back and tell me how it’s no different. smh.
A lot of CP soapers on here are snobs. No different than Coffee snobs, name brand snobs, etc. It is a creative process regardless if you buy the base premade or not. And actually, how does anyone really know just how well all of you CP soapers are really doing on your own base. Don’t be such a buzz kill for everyone else’s creative process.
How can you in good conscience call this natural or safe when you have to clue what’s in the soap base? Especially the clear soap, these products don’t often list their actual ingredients because they literally don’t have to by law. Granted, there’s no need to use lye, but in 20+ years of soap making, I’ve never had an issue with it. You just have to remember to soap safely and store it away from kids and pets. And there’s a note above about vinegar…NO. Vinegar causes a flash of heat when it comes in contact with lye. If you get it on skin or in your eyes…rinse rinse rinse.
On the other hand, melt and pour soap is a fun project with the kids and there are soap makers who specialize in this type of crafting. Their artistry is breathtaking. 🙂
You are not “making soap” you are remolding it. The melt and pour bases can be just as bad as bars you get in a store. You can buy lye anywhere as long as it is says 100% sodium hydroxide and has no dyes. I get mine at Tractor supply. I use 5 ingredients in my basic soap– olive oil, coconut oil, lard, goat milk and lye. Run the ingredients through soap Calc and have a bottle of vinegar on hand when working with lye. It’s really not that bad. Once you just do it you’ll wonder what all the worrying was about. Take the plunge and really MAKE soap!
How long will soap stay good with oatmeal in it?
doesn’t the soap base have lye in it? you can’t make soap without lye
Ahh wheesht ( scottish word for “be quiet”) the lot of you. Do you have a bar of soap at the end of the process? Yes ! So it is making a bar of soap from ingredients. Therefore it is soap making!! Good luck and thank you for sharing your recipe. There will always be those who remove joy to be prescriptive. Xxx
Do you have a bar of soap before you begin the project? YES. Because it’s already soap. To pretend this is soap making is an insult to all of us who actually make our own soap. And the product is inferior to real handmade soap. If you’re looking for a craft project for a young child, this would qualify, but it’s not even remotely close to the art of crafting soap.
What I mostly object to is the title, Making Soap Without Using Lye…it’s a lie. You CAN NOT make soap without some type of lye.
I agree!!!
i totally agree, which is why i really want to learn how to make soap from scratch! We really dont have anything like that around my area. I think i’m just over complicating the whole process and just need to start. I did find some lye at home hardware which says 100% lye crystals on it, but i will check out that site for my next batch, thanks Lori.
If you have any basic recipes that would help me start out please send them my way!
Thanks,
Carly
Carly, jump on in. It’s not that hard and if you mess up (everyone does at some point) you clean up and start over. Keep it super simple (Castle soap) and you’ll wonder what you were ever afraid of.
thank you for your response… i just attended a soap workshop over the weekend and had several questions but she wasn’t much help. maybe you can help me? I’m wondering how to use the soap calculator.. i dont have a set recipe, just certain ingredients i would like to use (olive oil, coconut and lye). But how do you know how many grams of each ? I just want a simple 2 lb recipe that i can adjust as i go. Also have you worked with micas? i recieved some in the mail, tried it couple times and not turning out as i thought it would. Do you add it to the soap or just to some oil seperately ? soo many questions!
If you do some research, all soap is made with lye. The melt and pore soap base has already been done for you, which with children is a good thing. You cannot make soap without lye of some kind. You even make glycerin with lye at the beginning so I just wanted you to think about that. Look on line, I have done my research so I know.
No such thing as soap without lye (sodium hydroxide). You are not making soap; you are using already made soap and remelting it…which you can’t do with real handmade cold process soap. You can do it with “melt and pour” soap because it has some type of alcohol added to it.
Please don’t confuse the two. This is NOT soapmaking.
Recently I bought liquid soap. Can I use that?
The lye (sodium hydroxide) is completely used up when you make soap. It basically is just there as part of a chemical reaction. If soap is made properly there shouldn’t be any left in the final product. Definitely not a good chemical to have around kids though…
There is no such thing as real soap without lye, as someone else mentioned here. Melt and Pour soap though is a great way to make soap without having to work directly with lye. However, I must caution everyone to read the ingredients!
Many of the soap bases you buy at Michael’s or Hobby Lobby have sulfates and other unsavory ingredients. Please, please read and know what you are putting on your body. Also, be very aware that in order to make soap meltable they have to add a solvent. That solvent is something they consider an industry secret and don’t add to the ingredients label. It can range from simple glycerine to straight alcohol, and anything in-between. Glycerine is a natural byproduct of the soapmaking process anyway, but by adding more you can make it clearer and more meltable, but it does result in a soap that is a bit stickier and more prone to melting. This is why many manufacturers trend toward less savory options or a mixture thereof. So if you are going to do this, and I heartily hope you do, you might want to stick with organic bases such as those available at Brambleberry or GloryBee Foods.
Another item I feel I must add – before using any spices, herbs or essential oils do your homework. Many, such as cinnamon, can cause irritation if not used with great care, some can lead to sensitized skin and photo-sensitivity, and other unintended side effects.
I enjoyed reading everyone’s stories about making soap. I have been wanting to make soap for Christmas gifts and I was afraid because of the lye, but now I have many choices and I am excited to make my homemade soaps. Thanks everyone!!! Happy Thanksgiving!!!!
I grew up in the Ozarks on a farm with my folks, grandparents & other extended family. They were very selfsufficient. We made much of what we needed & sold ( or often gave away ) the excess. I remember soap making every fall. A lot of preparation went into it. All year bacon fat was saved, to be added to the lard rendered the previous fall, rainwater was collected, ash from the woodstove & fireplace was saved too. When it got nearer time for soap making, the lye would be leached from the ash. All the children were cautioned to stay away from the lye barrel & we did, because the warning was accompanied by grusume tales of the results if we got into it! When Grandma decided it was a good day to make soap , she got out the big iron cauldron only used for that purpose,gathered up the lard & rendered drippings, the lye water, and made enough soap for the whole year. Some was for heavy duty cleaning, & other was for bathing. The heavy duty one was harsher than the bath soap. The last year I remember her making soap was1959. Each year from about 5, I got to help with a different part of the process as she determined I was ready for, until I learned all I needed to know to make soap.
What a wonderful story! I hope you have written this down to share with the young folks in your family. 🙂
The MP soap still has lye in it… and other harmful chemicals
So yeah…you’re still making soap with lye…
I was so just about to say exactly this. if you are using any melt and pour base there will be lye in it. It will have just gone through the saponification process and become soap. If you are going to use a melt and pour base for the love of god don’t buy the crap on amazon and in craft store, get it from a soap making supply company like Bramble Berry.
If anyone is too nervous to make soap from scratch but you also don’t like some of the extra questionable ingredients in melt and pour, you might look into “rebatching” a quality unscented natural soap. Basically you grate a bar of real soap, melt it down with some water and any essential oils or additives like oats, etc, mold and let it cure for a week or two. I don’t know exact measurements but many great soap making books and sites will have the info. Just look for “hand milled soap” recipes! This is a great compromise between from scratch and melt and pour and will most likely yield a high quality soap. Hope this helps some of you!
I am excited to try this recipe, and maybe add a little honey and oats to it. I do summer science with kids, and this sounds so great!
I understand that this is a way to make soap without you having to deal with lye but it is misleading to make people think that soap can be made without lye. It can’t, period. Lye must be used to make soap. Someone from Wildcrafting was excited for you to post there because they think the soap base which is really called melt and pour is less toxic. Melt and Pour soap base has preservative and detergents in it which are more toxic than learning to make soap the old fashioned way with lye. After you make soap there is no lye remaining in your handmade soaps and you don’t have the addition of detergents or preservatives. I respect those who make soap using melt and pour and you can create some awesome soaps with it, but if you are doing it to be more earth friendly then I have to disagree there. Although, they are coming out with some better product lately.
If you want to go totally handmade, you
can make the lye. It is only wood ash
from your fireplace and water.
Although I don’t know how long the
ash should be in the water.
But it sure is good to know if the
Zombie apocalypse occurs and we
can’t go to a store or order it ! Lol !!
Check it out on a prepper site.
You can’t make soap of any kind with out using some sort of lye. If you are using melt and pour, you are not making soap you are using someone else’s soap that they used lye in.
” Making” handmade soap is a very different process.
All soap bases contain lye unless they’re glycerin based only, so you’re not really avoiding lye. It’s impossible to make soap without lye, this recipe just saves you the step of making the lye based soap block first.
There are many reasons why handmade soap are better for your skin than commercial soap. Natural is always better than synthetic. 🙂
This is as close to “making soap” as melting popsicles and refreezing in a different shape is “making popsicles.”
Someone else made the soap in a factory, and the harsh chemicals the author mentions are still in this product. What do you think was used to make the soap base?
This kind of irks me, much the same way people who go buy wax from a hobby store and melt it down say they made a candle.
Unless you actually make your own soap (or wax for candles lol) you haven’t made soap. You’ve simply molded it..
Totally agree.
The advantage of not having lye around for children to get in trouble with may be valid, and melt and pour is a good intro into crafting for children, but….. it’s not soap making.
Hi! 🙂
This week’s edition of Wildcrafting Wednesday is all about personal care and cleaning and getting rid of the toxic and disposable items we use every day on our bodies and in our homes. This would be a great addition and I hope you’ll share it with us this week on Wildcrafting Wednesday.
Thanks! 🙂
awesome! thank you very much- just the soap making recipe i was looking for. 🙂 can you please tell me how long you think the shelf life of the soap is (should i make a big batch), and the best way to store it, like in an air tight container?
Soap does not go bad 🙂
However, the longer it cures the better it gets!
It is best to store it a container that gets some air circulation.
Soap that has fragrance in it may not smell as strong after some months (or years!) especially the citrus-type scents.
Please be careful using herbs such as cinnamon. They can be very irritating to the skin. Also when using essential oils, you need to use a safe amount. Please weigh all your ingredients and research how much oil to use per pound (16 oz) of base. Then you can calculate from there either up or down. Brambleberry has wonderful bases and a handy fragrance calculator for either fragrance oils or essential oils. Soap making is a lot of fun and you can get very creative with melt and pour.
Sodium Hydroxide (saponifying agent) is lye. By using the soap base, you are taking out the step where you are the one who has to deal with the lye.
this is BRILLIANT!!! I’ve wanted to make soap for quite some time but the lye…..NOPE! It’s too scary and I am very accident prone. Thanks so much for this!!!
I have always wanted to find a recipe for soap made without lye! I am so glad I found this recipe via Small Footprint Friday. My favorite scents would be lavender or orange.I often wonder why more people don’t make soaps without lye. Why is lye used so often in natural handmade soaps?
ALL soap, even the MP base is made with lye. The reason that lye is used so often in natural handmade soaps is because there is NO other way to make it. Without Lye, you do NOT have soap. Period. The MP bases are “making soap without lye” because the company that has made the base has already made the soap and used the lye for you. There is no such thing as soap made without lye. At some point, someone added lye to fat and/or oils to make it into soap. That is what sanctification is.
Miranda, I believe you mean to say “saponification” not “sanctification”…I’m an old-time soapmaker who has used lye and would rather do that than have MP soap with propylene glycol, which is used in antifreeze and all the sodium lauryl sulfates and sodium laureth sulfates, which makes the MP soap sudsy…and many other ingredients that are not so good for our bodies.
I agree with some of the above statements. All soaps are, at some point, made with lye. The soap base that you are using also contains a preservative, Methylchloroisothiazoline, that can cause allergic reactions for people with eczema. Many times things sound good and easy but when you make bar soap from scratch, you don’t need preservatives and it really doesn’t have to be all that hard.
I found your website from the link-up on raisinghomemakers.com. I really like your post! I have made my own soap before with lye and it is scary to me. 🙂 I’ll have to try this!
I would like to invite you to HomemakingHearts.com on Fridays for a brand new link-up; it would be a delight to have you join us!
Gabriella
Hi, I am a long time Soap Maker using lye, while I respect your decision to buy melt and pour soap base, its very important to know what is in that soap base, there are numerous places to buy melt and pour soap online. I was also was very nervous when I first started out making homemade soap do to the lye situation, but with careful handling and proper equipment its no big deal, but I do not have little ones running around any longer. I would just make sure that your soap base is pure and natural, Brambleberry is a great source for melt and pour soap, and you can add all kinds of things to your base. Have fun get creative! I just wanted people to know that with proper handling the lye situation can be conquered! If homemade soap is of interest to anyone.
Have fun!!!!
Elizabeth
I could not have said it better Elizabeth. I did a lot of research before I made soap the first time. I was
nervous the first time because of the lye, but I had everything laid out and took my time. When the soap was made it was so exciting and I realized the lye thing was no big deal as long as one follows
recommendation. If one wants to do it with kids then melt and pour would be better.
how long do you cure it?
You don’t cure it…it’s already soap. Most of the time it’s made with lye, oils and chemicals.
Our family prefers liquid soap – we find we use less and it leaves less soap scum to clean up later :-). Have you tried any natural liquid soap recipes you like? The natural ones are so spendy at the store!
I use soap nuts (technically soap berries). You can buy the berries and boil them to extract the saponins to form a liquid soap. I add glycerin and xanthan gum (mix the glycerin and xanthan gum first to avoid clumping) to mine to thicken it a bit to make it more usable for hand soap and shampoo. I leave it plain liquid for household cleaning and laundry. It’s about as natural as you can get for soap.
This is great! What a great way to introduce little ones (who love to be hands-on) to soap making…without the chemical burn risk. Thank you for sharing this – I’ll pin it for later.
I’m visiting from the Growing Home link-up 🙂
~Lisha
What is the soap base made of?
The base I linked to above is from Michael’s and has some “iffy” ingredients. This one is much better: http://amzn.to/1hJvliG. I linked to the exact one I used, since that seemed like the honest thing to do. 🙂
All soap bases are made from oil and lye (sodium hydroxide). Without lye you don’t have soap.
exactly!!! so it is wayyyyy better to do it urself than buy it without knowing what it contains!
The ingredients in the base that she linked are as follows:
Water, Propylene Glycol, Sodium Stearate, Glycerin, Sucrose, Sodium Laurate,Sorbitol, Sodium Laureth Sulfate, Sodium Lauryl Sulfate, Goat Milk, Sodium Chloride, Stearic Acid, Lauric Acid, Silica, Titanium Dioxide,Pentasodium Pentetate, Tetrasodium Etidronate, Methylchloroisothiazoline, Methylisothiazoline
IMO, there are far fewer chemicals in homemade CP soap than this MP. If the reasoning behind using MP is to get away from harmful chemicals, then I certainly wouldn’t go with any of this. If the reasoning is to just have someone else handle the lye while you decorate, then I can see using this, but would rather just buy from a CP soaper.
It also depends where you get it I got goats milk soap base that has about 5 ingredients from bulkapothecary.com and it seems a lot more natural. My reasoning for soap base right now is I don’t want to be handling lye at 7 months pregnant. So I tried to find a still healthy alternative.
You can infact make soap without lye by using pure shea butter for the base. If you feel that lye maybe too harsh to use.
The shay butter is the oil. You would still need the lye.
I love using the silicone molds. So easy to remove the soap.
Interesting-I love DIY projects!
Finally! A recipe without lye! Can you tell me where I find this “soap base”?
I get mine on Amazon (http://amzn.to/1f9zc6s) but you can also get it at craft stores like Michael’s or JoAnn’s.
The melt and pour bases have the lye already in them. Soap cannot be made without it. Look at the ingredients but it is not bad it just raises the pH and that is what the chemical reaction is for. I did a lot of research because I was worried about it too.
hey im wondering if you know where i can find lye?? i heard home hardware?? is this safe to use???
You shouldn’t buy lye from a hardware store; it frequently has other chemicals in it. There are a lot of soap making suppliers online that sell it. Here’s where I get mine:
http://www.brambleberry.com/Sodium-Hydroxide-Lye-P3037.aspx
Some ace hardwares carry it.. it’s perfectly safe to use I’ve been using that brand for 10 years it’s just not “food safe” so you can’t use it to make things like pretzels.. I strain my lye water into oils..
Some ace hardwares carry it.. it’s perfectly safe to use I’ve been using that brand for 10 years it’s just not “food safe” so you can’t use it to make things like pretzels.. I strain my lye water into oils..
I have found a small selection of soap bases at Michaels, Hobby Lobby and other craft stores, and use the store’s coupons to get a better price (usually 30-40% off). Without the coupon, a 2-lb. tray usually goes for around $9.99. Michael’s has a decent selection of “essential oil/fragrance oil” blends for melt and pour. I also have some favorite online resources for melt and pour bases: http://www.wholesalesuppliesplus.com, http://www.bulkapothecary.com, and http://www.brambleberry.com, to name just a few. Wholesale Supplies offers free UPS ground shipping with a $35 (I think) order. Amazon probably has the best prices on silicone molds, but sometimes you can find them at craft stores after a holiday season for half off the regular prices.
Anyone who says you can make soap without lye doesn’t know how to make soap. The melt and pour is made with lye. and you don’t make it you melt it. I have been making soap for a long time. I have made the melt and pour soap. It is made with lye.
Hi can you tell me a simple soap recipe with lye for a beginner please (quantity, ingredients and how many soaps it will make.)? I would like to try to do it myself but I wish it can be an allergy-free (eczema) soap. Thanks 🙂
Raphaelle, a soap recipe with instructions would take up a lot of space here, so here’s a link to a basic soap recipe with tea tree (tea tree oil is antibacterial and may help with eczema), but truthfully, any handmade soap that doesn’t contain all the chemicals found in commercial soaps is better for eczema. In addition to the 5 oils/butter in this recipe, I use rice bran oil, avocado oil, cocoa butter and mango butter. But this is actually a good basic recipe as these oils (olive, coconut, palm kernel, castor and shea butter) are excellent and are the standards used by most soap crafters.
http://www.soap-making-resource.com/soap-making-instructions.html
Here’s a saponification chart and how to calculate lye. (you’ll need to scroll down a bit)
http://www.millersoap.com/soapdesign.html
And here’s the handiest (and best) lye calculator on the net.
http://soapcalc.net/calc/soapcalcWP.asp
Thank you very much, you’re very kind 🙂
Clearly, you didn’t read the article or you are waaaay too literal.
Melt and pour can be fun but it is not making soap. As you said, all soap has lye in it. I love making soap and use food grade lye because it is pure. Yes, lye is used in food making too. It is safe if one follows the safely guidelines. soap making has been done on homesteads for generations.
Where can I find food grade lye?
Agreed. This article was a complete waste of time Because of misrepresentation.
Just say what it actually is you are. doing: making soap with soap base
already added.
You actually said that it was great to use soap without lye because it is harsh, but then you go ahead and use premade soap (containing lye) to make your soap with!
This would not be an issue if you advertised your recipe accurately so that people looking for a lye free recipe could find real results.
Why when I make melt and pour and Follow the directions of how much
Essential oil to put in and I even added more my soap does not smell nice?
I agree! I’ve been making soap for years and I always get mad when someone says you can
make soap without lye. Not possible! Melting a base and pouring into a mold is not making
soap and guess what your base was made with lye!
I get mine from hobby lobby store.